SludgeMunkey
New member
- Joined
- Nov 11, 2008
- Messages
- 2,299
- Reaction score
- 101
- Points
- 0
- Location
- Bellevue, Nebraska
- Country
- United States
- Display Name
- Johnny O. Farnen
I have problems getting real wood that meets my needs here. I do not have a sandblaster handy, so I cannot "force" the wood I can get to meet my needs.
So, when all else fails, make your own.
Here is what I used:
2 inch Diameter Schedule 80 PVC pipe (any diamter will doo as long is it is the thick walled schedule 80)
a die grinder with a 1/4 inch carbide bit, ball shaped
a torch
Cut your PVC to length. Do any major holes and uneven ends with a saw.
Heat the pipe up till it is soft, then bend it to the shape you want. (This takes practice) It gets HOT! Wear gloves and use tools to move the pipe into position. I used pliers and a foot long section of wooden broom handle.
I used compressed air to cool it quickly, as it takes a long time to "set up" otherwise. Cold Water works too.
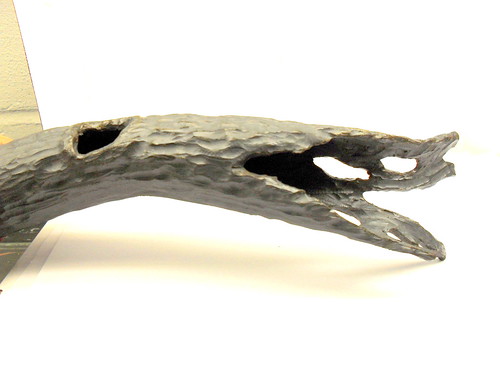
Now take the die grinder (or Dremel tool) with the ball shaped carbide bit (You have to use a metal bit, Dremel stones just clog up) and use it to texture the surface. It is also good for sculpting holes.
Once textured, you should use the torch or heat gun to melt off any remaining plastic fuzz left over from grinding.
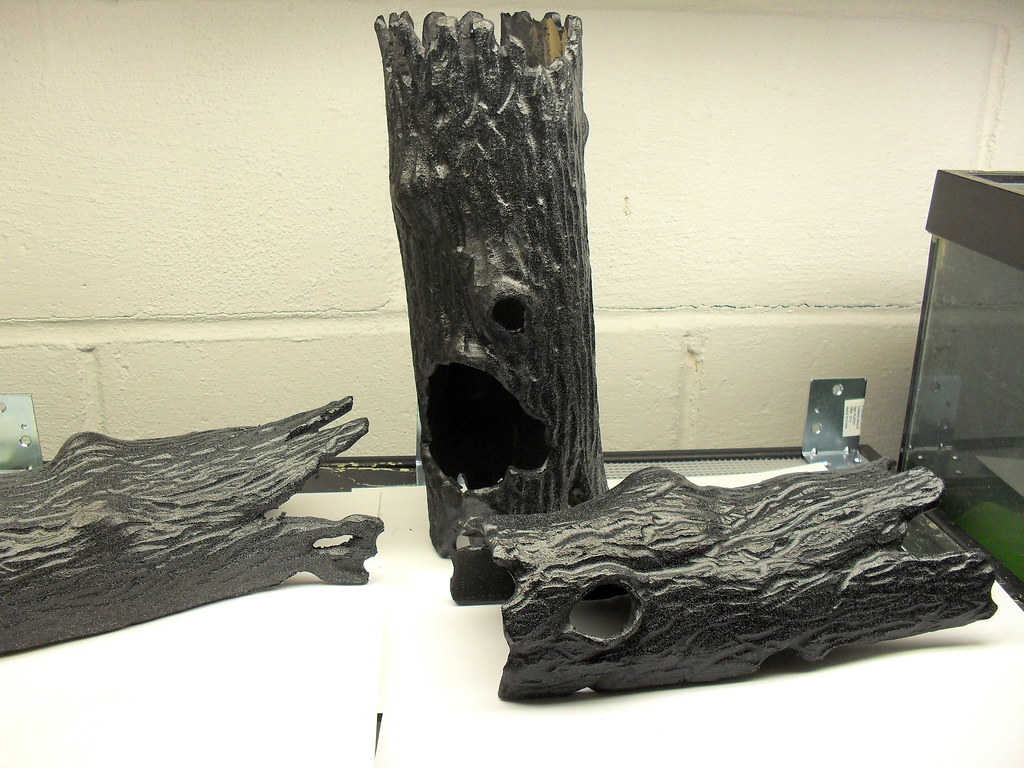
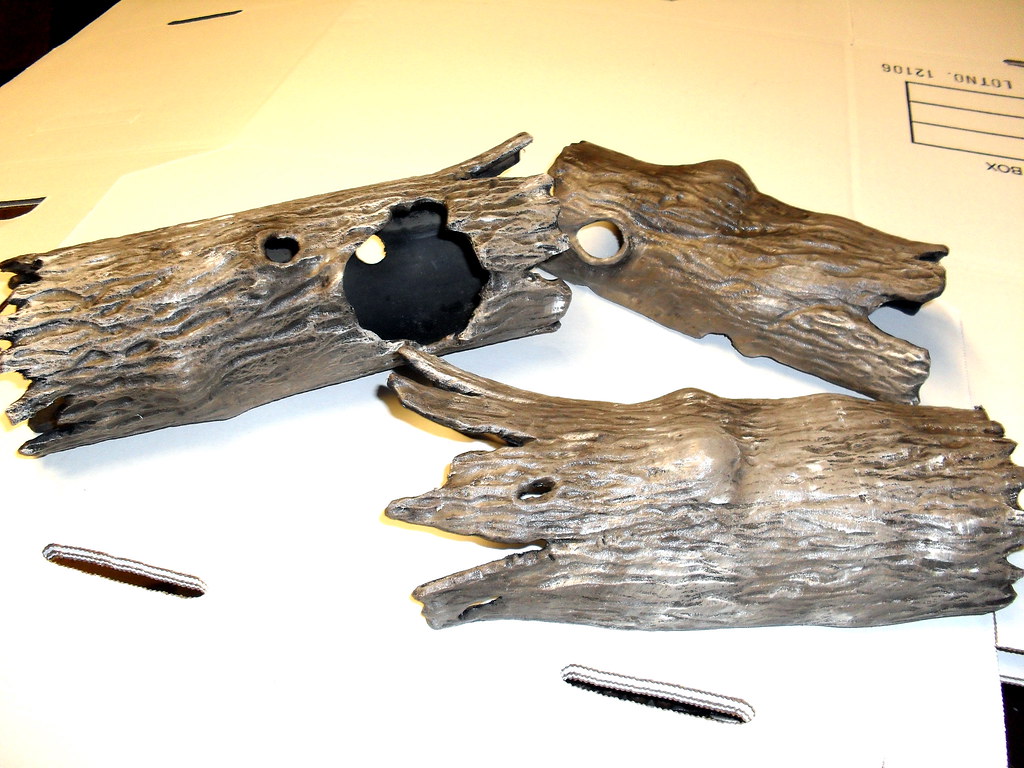
Here is the end result:
Suitable for aquatic and terrestrial use.
Water proof.
Rot proof.
Paintable.
And it does not float.
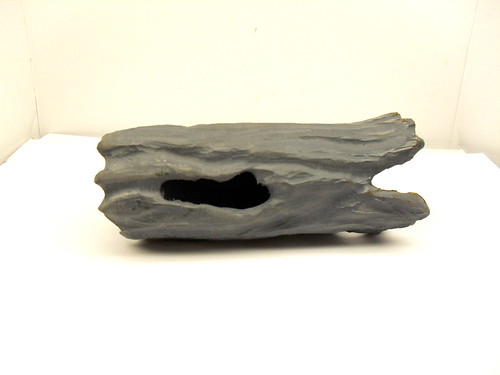
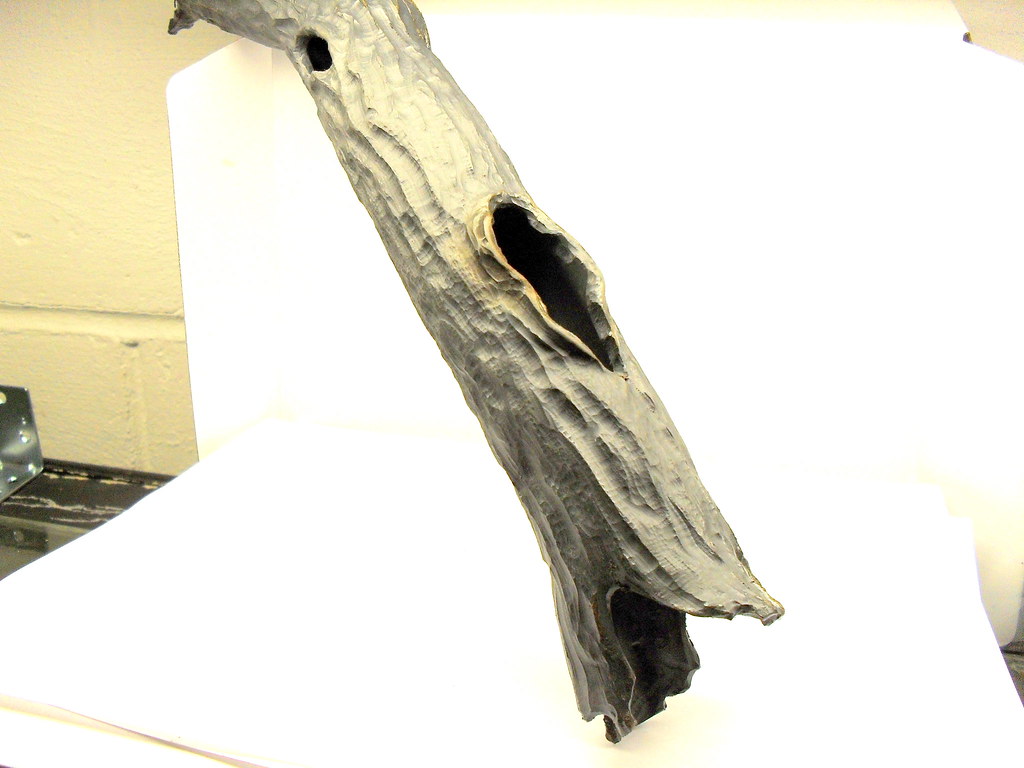
These are all unpainted, but you get the picture. Total cost: 10 bucks for a ten foot section of pipe, and a few hours of work.
So, when all else fails, make your own.
Here is what I used:
2 inch Diameter Schedule 80 PVC pipe (any diamter will doo as long is it is the thick walled schedule 80)
a die grinder with a 1/4 inch carbide bit, ball shaped
a torch
Cut your PVC to length. Do any major holes and uneven ends with a saw.
Heat the pipe up till it is soft, then bend it to the shape you want. (This takes practice) It gets HOT! Wear gloves and use tools to move the pipe into position. I used pliers and a foot long section of wooden broom handle.
I used compressed air to cool it quickly, as it takes a long time to "set up" otherwise. Cold Water works too.
Now take the die grinder (or Dremel tool) with the ball shaped carbide bit (You have to use a metal bit, Dremel stones just clog up) and use it to texture the surface. It is also good for sculpting holes.
Once textured, you should use the torch or heat gun to melt off any remaining plastic fuzz left over from grinding.
Here is the end result:
Suitable for aquatic and terrestrial use.
Water proof.
Rot proof.
Paintable.
And it does not float.
These are all unpainted, but you get the picture. Total cost: 10 bucks for a ten foot section of pipe, and a few hours of work.
Last edited:
 Axolotl Enthusiast