Caudata.org: Newts and Salamanders Portal

Register a free account today to become a member! Once signed in, you'll be able to participate on this site by adding your own topics and posts, as well as connect with other members through your own private inbox!
Did you know that registered users see fewer ads? Register today!

New Tank

MRIGUY

New member
Joined
Aug 1, 2007
Messages
333
Reaction score
16
Location
Bethlehem, PA
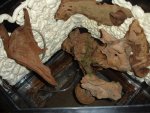
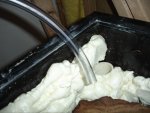
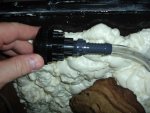
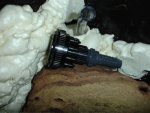
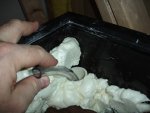
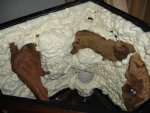
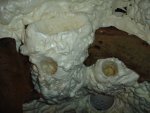
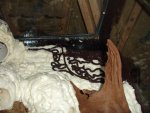
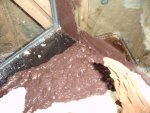
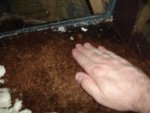
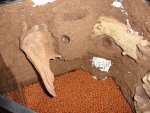
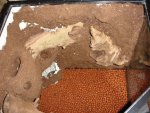
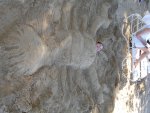
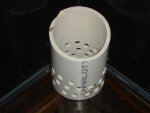
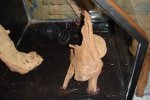
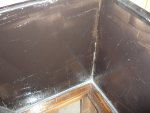
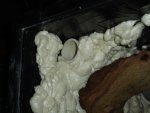
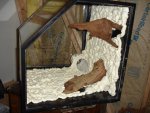
So I had this 44 gallon pentagon tank in the basement and decided to do a viv for a new office I am opening. I have not identified just what I am putting in there yet but figured I'd post some construction pics. This is really a free form project and I put little thought into the design other than to place the wood where it would hold plants and moss or cover a hose/cord if needed. It is generally understood that I am lousy with photos but lets see what happens.
 

Attachments

  • DSC01854.jpg
    DSC01854.jpg
    149.2 KB · Views: 307
  • DSC01859.jpg
    DSC01859.jpg
    93.9 KB · Views: 248
  • DSC01976.jpg
    DSC01976.jpg
    136.2 KB · Views: 261

MRIGUY

New member
Joined
Aug 1, 2007
Messages
333
Reaction score
16
Location
Bethlehem, PA
And 2 more shots.
 

Attachments

  • DSC01985.jpg
    DSC01985.jpg
    112.6 KB · Views: 270
  • DSC02000.jpg
    DSC02000.jpg
    170 KB · Views: 342

MRIGUY

New member
Joined
Aug 1, 2007
Messages
333
Reaction score
16
Location
Bethlehem, PA
The next step is to bulk up the foam in certain areas, do the silicone schmear, and cover with coco fiber. I'll likely get to that in the next few days and will take pics along the way. I have done this method a few times in the past but I always planned and layed out with paper and pencil. This one is a seat of the pants project and I am just going with it.
 

Kaysie

Site Contributor
Joined
Mar 10, 2003
Messages
14,465
Reaction score
110
Location
North Dakota
That is a REALLY odd shaped tank.

I think I'm going to have to get on this whole 'tank buildup' bandwagon... You guys make it look so easy!
 

i_love_necturus

New member
Joined
Dec 13, 2006
Messages
445
Reaction score
12
Location
Rhode Island
Yes indeed, very strange, but its wicked cool!:D I'll enjoy watching the build up and can't wait to see the finished product.
 

Slimy2

Member
Joined
May 7, 2007
Messages
222
Reaction score
8
Location
Springfield, Missouri
neat

It's nice how the tank is constructed with the glass at that angle so you can look down into it and see everything.
 

MRIGUY

New member
Joined
Aug 1, 2007
Messages
333
Reaction score
16
Location
Bethlehem, PA
OK. I added some more foam to an area where I think I will need to make a few pockets for plants. I also cut a piece of 1/2" tubing to length and fit it to a multi-port manifold that I will use to create two wet areas for wet plants and wood. I ordered a High Output T5 light fixture so this tank will have 96w of 6700k light which should be fine for most anything I am capable of growing (or killing as the case may be). I hope to make caves and possibly start the silicone / coc fiber process tomorrow.
 

Attachments

  • DSC02022.jpg
    DSC02022.jpg
    273.6 KB · Views: 337
  • DSC02023.jpg
    DSC02023.jpg
    298.8 KB · Views: 275
  • DSC02029.jpg
    DSC02029.jpg
    184.4 KB · Views: 276

MRIGUY

New member
Joined
Aug 1, 2007
Messages
333
Reaction score
16
Location
Bethlehem, PA
And some more
 

Attachments

  • DSC02030.jpg
    DSC02030.jpg
    190.5 KB · Views: 271
  • DSC02033.jpg
    DSC02033.jpg
    214.8 KB · Views: 268
  • DSC02034.jpg
    DSC02034.jpg
    130.9 KB · Views: 263

MRIGUY

New member
Joined
Aug 1, 2007
Messages
333
Reaction score
16
Location
Bethlehem, PA
So after I seal and coco the backgroung I need to do something with the bottom. My plan is to have the rear 2/3 of the tank be 4" of Hydroton with a screen and then 3" of coco substrate. I like to mix in a little charcoal and a pinch of sand. The front 1/3 will be open pond. The pond will be seperated from the land by wood, moss covered rocks, and whatever else I find when I take a walk to the stream by my house. I am open to suggestions if anyone has a brainstorm. As I said earlier, this whole project if a seat of the pants operation.
 

MRIGUY

New member
Joined
Aug 1, 2007
Messages
333
Reaction score
16
Location
Bethlehem, PA
Next Round

So the thick areas of foam have dried (#1) and I carved out some holes for placing plants (#2). I also roughed in the manifold and the 2 drip lines (#3). The drip lines will be coated in solicone and rolled in coco as a final step.
 

Attachments

  • DSC02040.jpg
    DSC02040.jpg
    142.8 KB · Views: 272
  • DSC02042.jpg
    DSC02042.jpg
    125.5 KB · Views: 263
  • DSC02046.jpg
    DSC02046.jpg
    94.3 KB · Views: 260

MRIGUY

New member
Joined
Aug 1, 2007
Messages
333
Reaction score
16
Location
Bethlehem, PA
Next Round #2

I added the silicone (#1 and 2) and then placed the coco fiber (#3). From previous projects I can tell you that the coco needs to be absolutely dry and pressed into a thick gloopy layer of silicone. Brown or black are preferred as they cover the foam better and do not show through on thin spots. The black foam works really well for this but I did not have any and Santa has not arrived yet, at least not from the closets I have checked so far :)

More to follow.
 

Attachments

  • DSC02049.jpg
    DSC02049.jpg
    145.9 KB · Views: 279
  • DSC02052.jpg
    DSC02052.jpg
    184.4 KB · Views: 296
  • DSC02054.jpg
    DSC02054.jpg
    88.2 KB · Views: 299

MRIGUY

New member
Joined
Aug 1, 2007
Messages
333
Reaction score
16
Location
Bethlehem, PA
Note of Caution

The other thing I should mention is that when you have a tank on it's side and are schmearing the silicone with your head in the tank, be sure to pull your face out before taking any deep breaths as the silicone will give you a wicked headache. It is also best to be sure the room is ventillated.
 

moonstream

New member
Joined
Dec 27, 2007
Messages
38
Reaction score
0
cant wait to see this done! what do you plan to keep in this? (besides plants)
 

Jennewt

Administrator
Staff member
Joined
May 27, 2005
Messages
12,451
Reaction score
146
Location
USA
The other thing I should mention is that when you have a tank on it's side and are schmearing the silicone with your head in the tank, be sure to pull your face out before taking any deep breaths as the silicone will give you a wicked headache. It is also best to be sure the room is ventillated.
LOL, I know exactly what you mean. There's nothing quite like the feeling of vinegar fumes on the inside of the nose!
 

Daniel

Site Contributor
Joined
Aug 15, 2007
Messages
664
Reaction score
26
Location
Germany
Nice how-to-do!

Can you give me any information on this foam you use? Ingredients or something?
I like this thing and am curious if I might get something similar (and unharmful to newts...) over here in old Europe.
 

MRIGUY

New member
Joined
Aug 1, 2007
Messages
333
Reaction score
16
Location
Bethlehem, PA
I have one more small section of foam to cover this afternoon. I do need a HD run for more brown silicone though. I'll post more pics later tonight.
 

MRIGUY

New member
Joined
Aug 1, 2007
Messages
333
Reaction score
16
Location
Bethlehem, PA
OK, so I finished the silicone and coco fiber. I vacuumed the wall with the shop vac then washed the whole thing with clean water. I added the hydroton this evening. (Photos 1 and 2) I would have been done sooner but I had a vacation and as you can see in photo 3 I was focusing on crustaceans for a bit.
 

Attachments

  • DSC02218.jpg
    DSC02218.jpg
    304.4 KB · Views: 288
  • DSC02219.jpg
    DSC02219.jpg
    298.1 KB · Views: 265
  • DSC02196.jpg
    DSC02196.jpg
    268.3 KB · Views: 281

MRIGUY

New member
Joined
Aug 1, 2007
Messages
333
Reaction score
16
Location
Bethlehem, PA
You can see in the photos that there are some areas where the foam is visible. This is the camera angle and in the frontal shots it looks better. I also left a few areas more open for planting. As soon as the glass canopy comes in I will start planting. Till then humidity control will be too much of a nightmare.
 
General chit-chat
Help Users
  • No one is chatting at the moment.
    There are no messages in the chat. Be the first one to say Hi!
    Top