MandiceP
Member
- Joined
- May 21, 2012
- Messages
- 64
- Reaction score
- 2
- Points
- 8
- Location
- North Eastern CT
- Country
- United States
- Display Name
- Mandi
Have a hide/tank decor that you made yourself? Show it off here!
Here are the step by steps for the hide that I made for my two axolotls that will be going in the new tank when I get it!
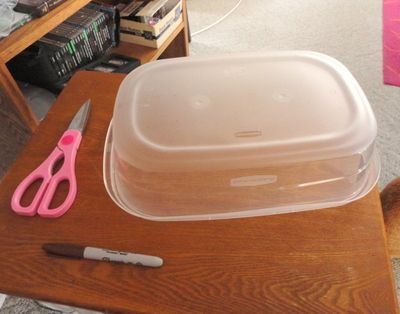
supplies list:
- Scissors (I also used pruning shears, lol)
- A sharpie for marking the cuts (optional I guess)
- Aquarium safe silicone (purchased for $4.50 USD per tube at Home Depot, I used just about 4 2.8oz tubes for this project but I probably could have taken it down a notch or two, I was just being safe... lol)
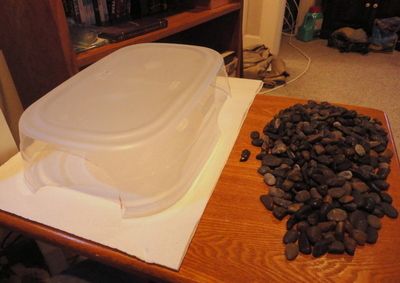
- Clean aquarium safe rocks/pebbles/gravel/stones whatever you want. I contemplated using sand too but next time maybe. I already had a ton of rocks on hand from when I had 12 bettas all in individual 2 gallon tanks with the same decor
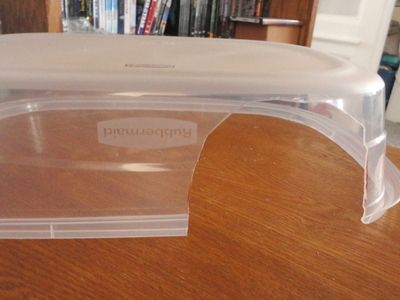
- A new clean plastic food storage container. I used Rubbermaid but I'm sure Gladware or Ziplock or similar would work just fine.
- Some silk aquarium plants if you want. I cut one up and used the leaves for my project and I'm really happy with the results!
- Most importantly, a well ventilated clean flat work space and a big imagination.
Step 1:
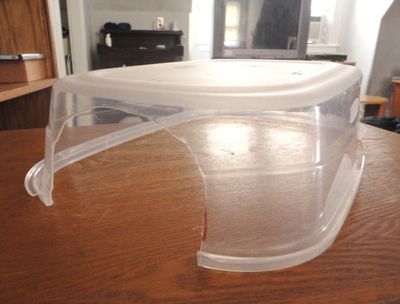
Mark where you'd like to make your cuts for entries into the hide. This is optional, you can wing it if you like. I made two entries. One on the side and one on the front. I put the one on the front more towards the right side so they have room to enter and exit when they get big. My goal is for this hide to be large enough for adults!
Step 2:
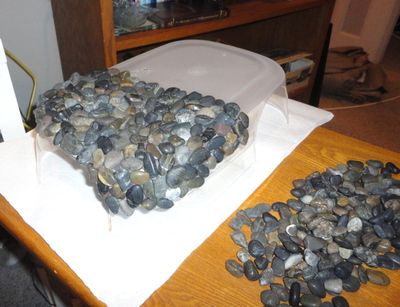
Cut out the spots you marked. After I took the picture I decided to cut off the lip around the bottom. I was originally going to leave it so I could bury it in the sand but then thought better of it. You can see the lip cut off in the next step
Step 3:
Assemble the rest of your supplies and get a good idea of where you want things. I decided to leave the back and left side of the hide rock free because they will butt up against the glass of the tank and this way I can see if anyone is in the hide. Also the back is going to be against a background so who cares if it has rocks... lol This keeps it from being way too heavy as well.
Step 3:
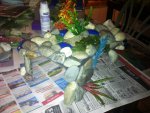
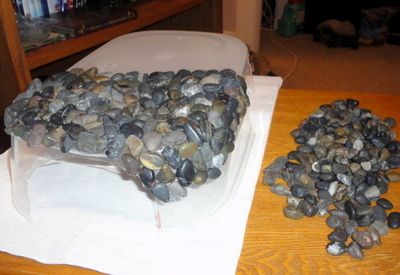
Start gluing! I tried a couple different ways of siliconing the rocks. I tried spreading a bunch of silicone onto the plastic and sticking the rocks too it, then I tried siliconing the rocks and sticking them where I want them, then I just squirted blobs of silicone in general areas and spread it out by pushing the rocks onto it where I wanted them. All three methods worked, just do what you are most comfortable with!
Step 4:
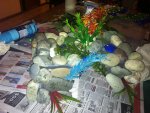
When you think you are finished let it sit over night and then take a good look at it the next day... chances are you'll see a spot you want to add more to and you might have another good idea of where to add a couple more things... I know this happened to me 3 days in a row. The silicone cures in about 24 hours so you have to be patient. I let it dry for 24 hours each time before adding any more. Lol
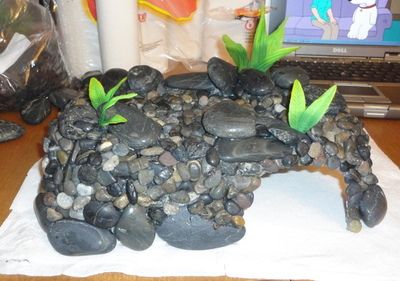
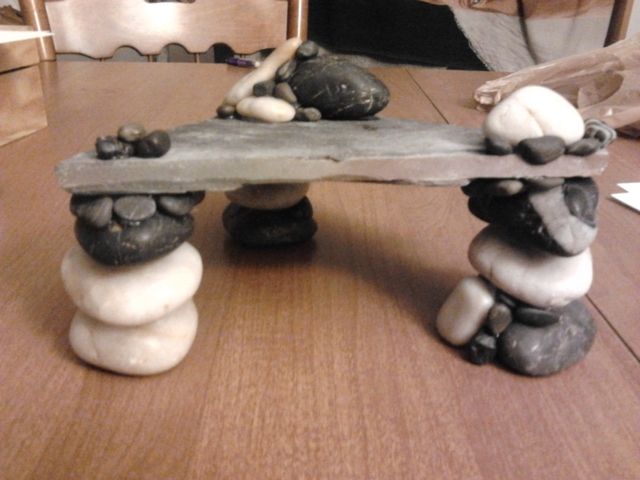
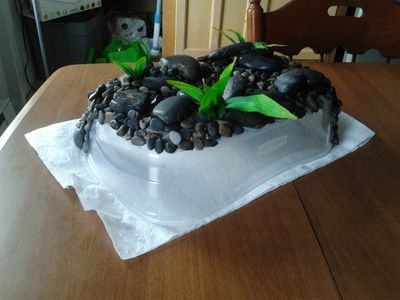
^ this was my first rough draft finished product!
Step 5:
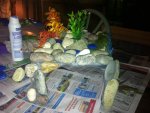
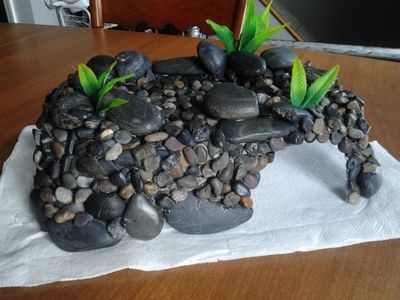
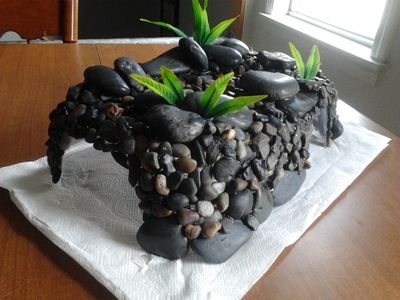
DONE! Now I plan on soaking it in water for a couple days and changing out the water in that bucket several times just to rinse it thoroughly and make sure that it is all watertight and everything. YAY!
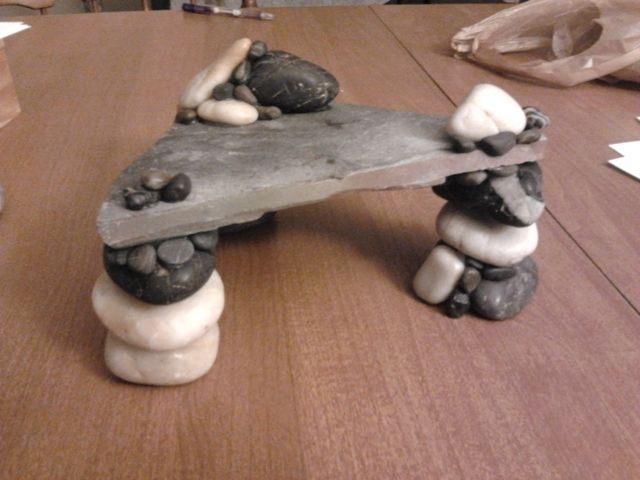
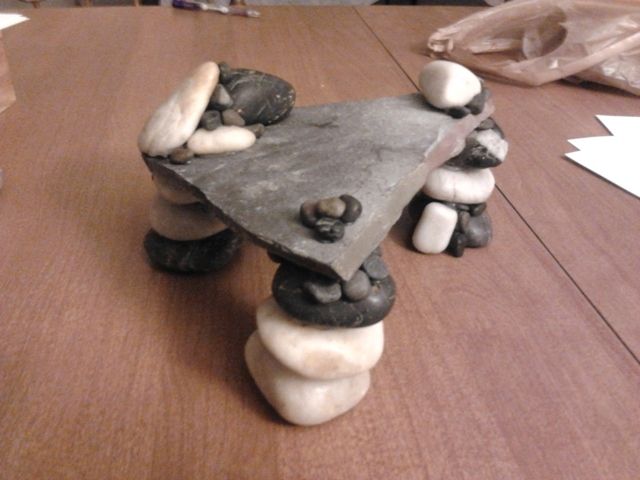
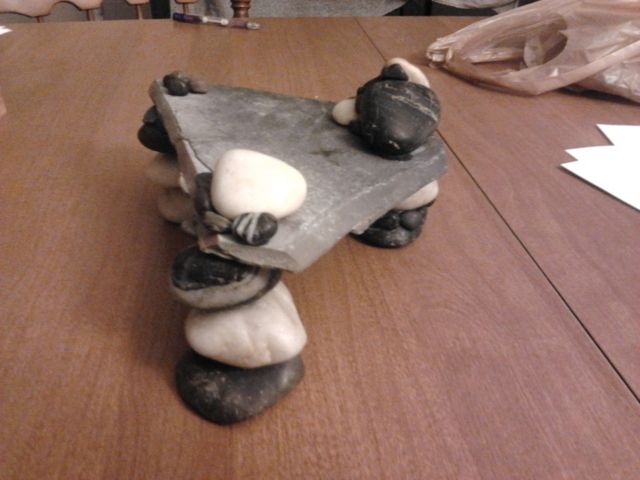
These are the final finished product pictures before soaking
The next thing I plan on doing is either foam and quikrete related or maybe a cave made out of siliconed stacked slate or something. I'm not sure yet. I still have a few weeks before the snake I'm sitting for leaves and I have free shelf space to set up my new tank! YAY
Now lets see you guys' homemade projects!
Here are the step by steps for the hide that I made for my two axolotls that will be going in the new tank when I get it!
supplies list:
- Scissors (I also used pruning shears, lol)
- A sharpie for marking the cuts (optional I guess)
- Aquarium safe silicone (purchased for $4.50 USD per tube at Home Depot, I used just about 4 2.8oz tubes for this project but I probably could have taken it down a notch or two, I was just being safe... lol)
- Clean aquarium safe rocks/pebbles/gravel/stones whatever you want. I contemplated using sand too but next time maybe. I already had a ton of rocks on hand from when I had 12 bettas all in individual 2 gallon tanks with the same decor
- A new clean plastic food storage container. I used Rubbermaid but I'm sure Gladware or Ziplock or similar would work just fine.
- Some silk aquarium plants if you want. I cut one up and used the leaves for my project and I'm really happy with the results!
- Most importantly, a well ventilated clean flat work space and a big imagination.
Step 1:
Mark where you'd like to make your cuts for entries into the hide. This is optional, you can wing it if you like. I made two entries. One on the side and one on the front. I put the one on the front more towards the right side so they have room to enter and exit when they get big. My goal is for this hide to be large enough for adults!
Step 2:
Cut out the spots you marked. After I took the picture I decided to cut off the lip around the bottom. I was originally going to leave it so I could bury it in the sand but then thought better of it. You can see the lip cut off in the next step
Step 3:
Assemble the rest of your supplies and get a good idea of where you want things. I decided to leave the back and left side of the hide rock free because they will butt up against the glass of the tank and this way I can see if anyone is in the hide. Also the back is going to be against a background so who cares if it has rocks... lol This keeps it from being way too heavy as well.
Step 3:
Start gluing! I tried a couple different ways of siliconing the rocks. I tried spreading a bunch of silicone onto the plastic and sticking the rocks too it, then I tried siliconing the rocks and sticking them where I want them, then I just squirted blobs of silicone in general areas and spread it out by pushing the rocks onto it where I wanted them. All three methods worked, just do what you are most comfortable with!
Step 4:
When you think you are finished let it sit over night and then take a good look at it the next day... chances are you'll see a spot you want to add more to and you might have another good idea of where to add a couple more things... I know this happened to me 3 days in a row. The silicone cures in about 24 hours so you have to be patient. I let it dry for 24 hours each time before adding any more. Lol
^ this was my first rough draft finished product!
Step 5:
DONE! Now I plan on soaking it in water for a couple days and changing out the water in that bucket several times just to rinse it thoroughly and make sure that it is all watertight and everything. YAY!
These are the final finished product pictures before soaking
The next thing I plan on doing is either foam and quikrete related or maybe a cave made out of siliconed stacked slate or something. I'm not sure yet. I still have a few weeks before the snake I'm sitting for leaves and I have free shelf space to set up my new tank! YAY
Now lets see you guys' homemade projects!
 Asian Newt Group